
After my last post displayed me sitting in a corner, gathering dust, I decided to showcase a couple other things that I’ve been up to. That way I won’t appear quite so lazy. Don’t get me wrong – I’m plenty lazy. Just not that lazy. Even I have my limits.
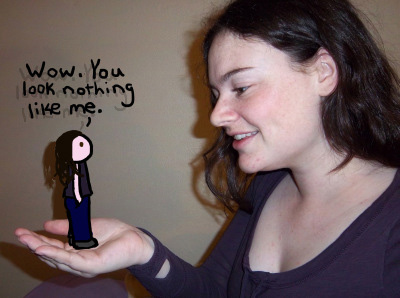
First, I made a teeny tiny change to my personal appearance. Some may remember the picture below from this post. I actually fixed it up a little bit since I know how to use Photoshop better now. And by “better” I mean I learned what the smudge tool was.
Well… now there’s an even bigger problem…

Yeah, I got a haircut. Once every few years or so I get bored with looking like Cousin Itt, so I get all my hair cut off. The problem is exactly what Mini Bex is saying above: I now look nothing like my adorable little doppelganger. Other than her signature purple shirt, her only real distinctive trait is her long, messy hair. So does that mean Mini Bex will be getting a haircut, too?

Nah. She’s just fine the way she is. I’m pretty sure no one would recognize her if she had shorter hair. They’d be all like, “Wow, is there a new character in this blog? Follow up question: Did she steal Mini Bex’s purple shirt? Follow up to the follow up: Did she murder Mini Bex for her purple shirt?”
So Mini Bex gets to keep her long hair.
What else have I been doing?
Art, of a sort.
It all started when I was doing some calligraphy practice using chisel tip markers.

Then, days later, I accidentally set something wet down on top of the paper. This led me to discover something neat, and I started adding more water.

Then I decided to take it a step further and start doing this stuff on purpose. I chose to work with a line of poetry that I saw back in high school. I never Googled where it came from until now. The top search was “The Love Song of J. Alfred Prufrock,” so I think that’s where it’s from.
Someone had used it for an art project. They drew a picture of a person with their index finger hovering above a big red button, and they included the words “Do I dare disturb the universe?” Those words always stuck with me. So I did my own version.

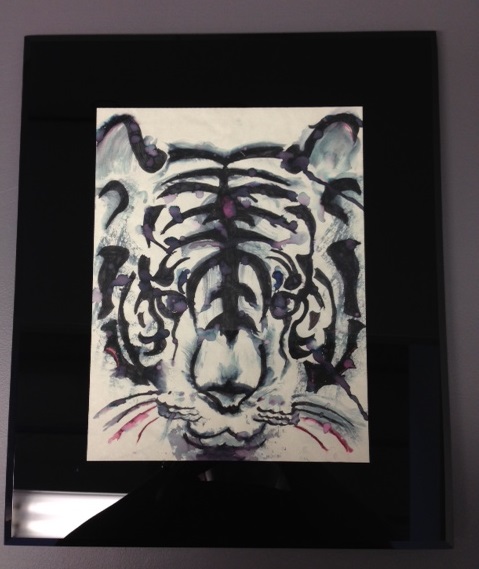
Then I thought, “Why not take it a step further?” So I started Googling some tribal tattoo designs for animals. I started by making a tiger for my sister, which she put in an amazing frame:
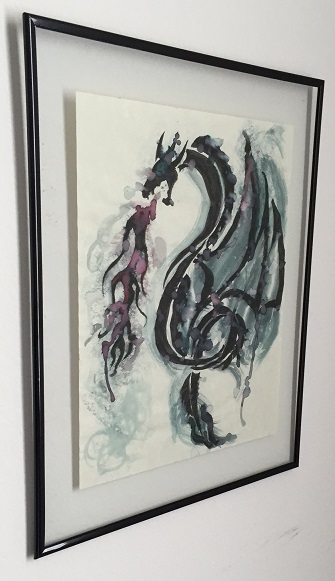
Then I made a dragon for my brother, which is also in an awesome frame right now:
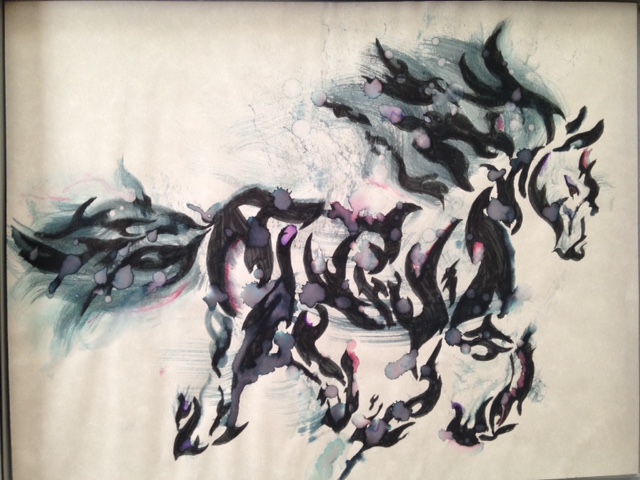
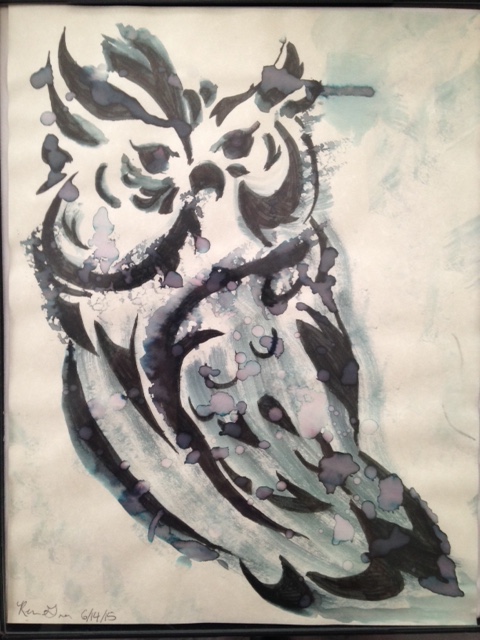
I did a horse for myself and an owl for my husband:
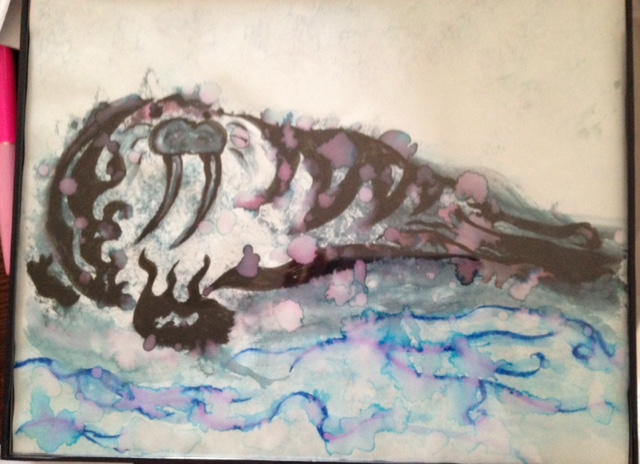
Then I decided to stop taking other people’s designs and start doing my own. I’m really good at copying stuff, so when my sister-in-law requested a walrus, I drew one of my own. Then I created my own tribal-inspired design for it, copied it with calligraphy markers and voila:
To those artists out there who originally created the designs I used for the dragon, the horse, the owl, and the tiger:
I’m sorry I used your art without your permission and without crediting you. I did not sell any of these drawings. They were all gifts. If it bothers you that you did not receive credit, please do send me an email and I will happily offer credit where credit is due. Unfortunately it is hard to track down the original designer of a tattoo when said tattoo was found on Google Images. I’m sure a person much smarter than I could do it, but I do not want to risk offering credit to the wrong person or website.
From now on, I will only be creating my own designs. Now that I have the hang of it, I think I’ll be able to do a decent enough job.
Currently I’m working on a coyote, so I thought I’d show you the creative process now that I’m doing my own art.
Step 1: Sketch a coyote and his surroundings, then go over the lines with Sharpie to make them easier to trace.

Step 2: Trace over the Sharpie coyote with pencil and begin developing shapes, rather than hard lines.

Step 3: Go over pencil lines with Sharpie, eliminating the designs that don’t work.

Step 4: Trace again, this time on parchment paper using a chisel tip calligraphy marker. (In this case, multiple chisel tip calligraphy markers. I find black creates the coolest effect, but sometimes a little color is nice, too).

Step 5: Use paint brushes, a kitchen sponge, paper towels, and fingers to apply water.

Step 6: Wait for picture to dry. Retouch certain lines and add last-minute details.

It’s a really fun pastime, though I must say it leaves its mark.

On the sponge, too.

But my favorite part is looking at what happens to the paper towels I use. This is the closest I’ve ever gotten to making art out of paper towels.


So that’s what I’ve been up to! Now you’re all caught up.
See ya next time!
P.S. I just glimpsed through my post with the flowchart from April, and at the very end I said something about wanting to talk about the “art of criticism.” I must have had something in mind at the time, but for the life of me I can’t remember what that is. If I figure it out, I’ll do a post on that next.
